How To Create a Website In Under 15 Minutes

Do you want to learn how to create a website the fast and easy way in just under 15 minutes? This guide is for you.
Wait… why do you need a website?
Well, almost anybody can have a use for a website these days.
For example, a photographer might need a website to showcase their talent and attract clients, a small cake shop wants to finally take it online and receive exposure via the web and google local business traffic, or maybe someone wants to start selling their homemade soap online, all of them will need a website.
And if you are a net hustler or you’re planning to become one, and you want to make serious money online, well then, having a website is a must in this business.
It’s also better to start creating your website sooner rather than later…
Ok… ok enough talk, let’s get back to business…so:
How To Create A Website Using WordPress in Under 15 Minutes

Yes, you can make a website faster than that, I can make one in just 5 minutes, but for this tutorial let’s keep it at a nice 15 minutes since most of you will have to do this for the first time… plus there’s no rush)
So here’s what you will need in order to have your website up and running in no time:
- Register a domain name (www.example.com)
- Get web hosting (this is the thing that keeps your website online for the rest of people to see and access)
- Create your website using a fast and popular CMS (content management system) such as WordPress with 1 click
- Install some plugins and customize the website also optimizing it for SEO
- Create content, and promote your site.
So in this tutorial, we will be focusing on just the first 4, because creating content and promoting your website are things that I’ve talked about in other posts such as: How to create engaging content for your blog or cheap traffic sources.
Luckily for you, if you go ahead and use my recommended hosting company (you will see which one in a minute), you will be able to do all of the first 3 points, in one go, with just one account, super fast and easy…
1. Register your domain name

To get a domain name you have 2 options on how you can do that.
You can do it the hard way: You go to a website like NameCheap and register your domain there and then get web hosting from another company in order to have your website online.
But this method is more advanced, because you will have to create and maintain 2 accounts in separate places, and have to know how to manually pinpoint the domain name to the hosting server, using unique nameservers that the hosting company will give you and you will have to set those up inside NameCheap etc…
After that you will have to wait about 24 hours for the domain name and nameservers to propagate and start working together, so yeah, it’s not really that fast or good for novices.
As you can see that is a lot of work and you might end up making a mess, oh…and you end up paying more (you’ll see why in a second) that is why I suggest the following method since you don’t really want to screw things up:
You can do it the easy way:
You register the domain name and get the web hosting from the same company, this way you skip over the hard part in having to manually do everything since both the domain name and the hosting is coming from the same company, you can get your site up and running in minutes. I really recommend you do it this way since it’s easier, faster and cheaper.
For a more in-depth guide, check out my domain registering tips: How To Choose a Domain Name
2. Get Web Hosting

The company I suggest and recommend you to use for this is BlueHost
Why BlueHost?
Because when you’re starting out, you don’t want to manage your own servers, and manually doing everything like maintenance, security updates, fixing bugs and errors, etc… and also you don’t have lots of money to spend each month on super dedicated servers.
With Bluehost, you don’t have to worry about any of that…
Bluehost’s servers are one of the fastest in the industry of shared web hosting since their servers are running on super fast SSD hard drives. They are also in this business for over 15+ years, and setting up websites with them is easy and fast, not to mention cheap as well.
I used this company for all of the websites that I created over the years, and I still have some sites hosted with Bluehost even today. (Some sites I moved to VPS and Dedicated servers which are more powerful etc…but you only have to do that if your websites receive millions of people in traffic, so you don’t have to worry about that right now)
Oh… right, I forgot to mention that by registering your domain name with BlueHost you also save money.
Because if you sign up for a web hosting plan with them, you will get a FREE domain name. So you only end up paying for the web hosting, which you would have to do anyway, regardless of who is hosting your website.
To get started is actually pretty easy, you go to BlueHost.com
(Disclosure: Yes, these are affiliate links and I will get paid a small commission. If you choose to buy through my links I will get a small commission at no extra cost to you. In fact, you actually end up saving more money since you will get a discount by using these links..)
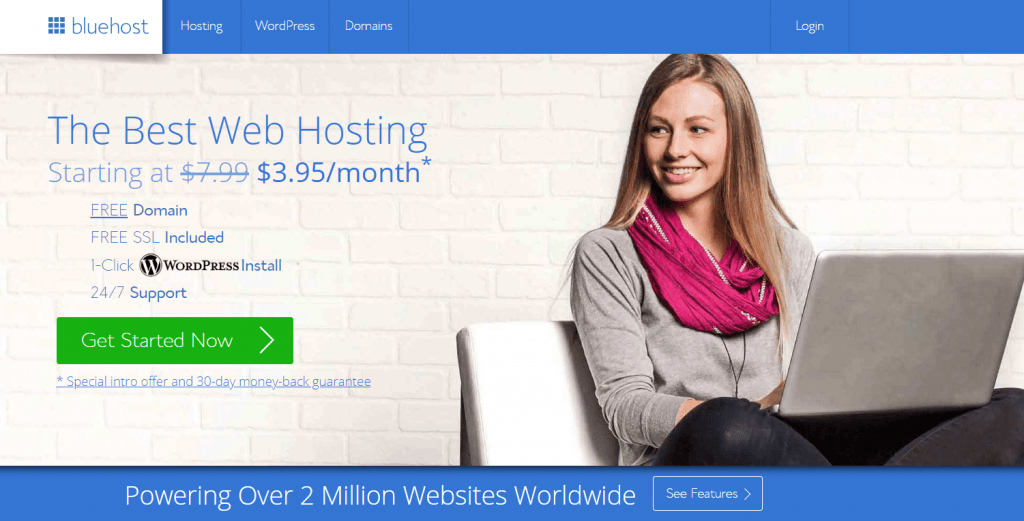
On the Bluehost page, simply click on the big green button that says: “Get Started Now”
Since you are starting out, you don’t need all the big and fancy plans, and in fact, you can do just fine with the basic plan. You can even run several websites on this, so it’s not really an issue, plus you can always upgrade it later on.
After that you will have to add your domain name, now if you already have a domain name that you registered with some other company, you will have to type it on the right box (the one that says “I have a domain name”).
If you don’t have a domain name yet, and you would like to get a free one from BlueHost, use the first box, and enter your desired name there, if it’s available click next to continue, if it’s not available, try other different combinations and names for your domain name until you get one that it is available, and then click on the “Next” button.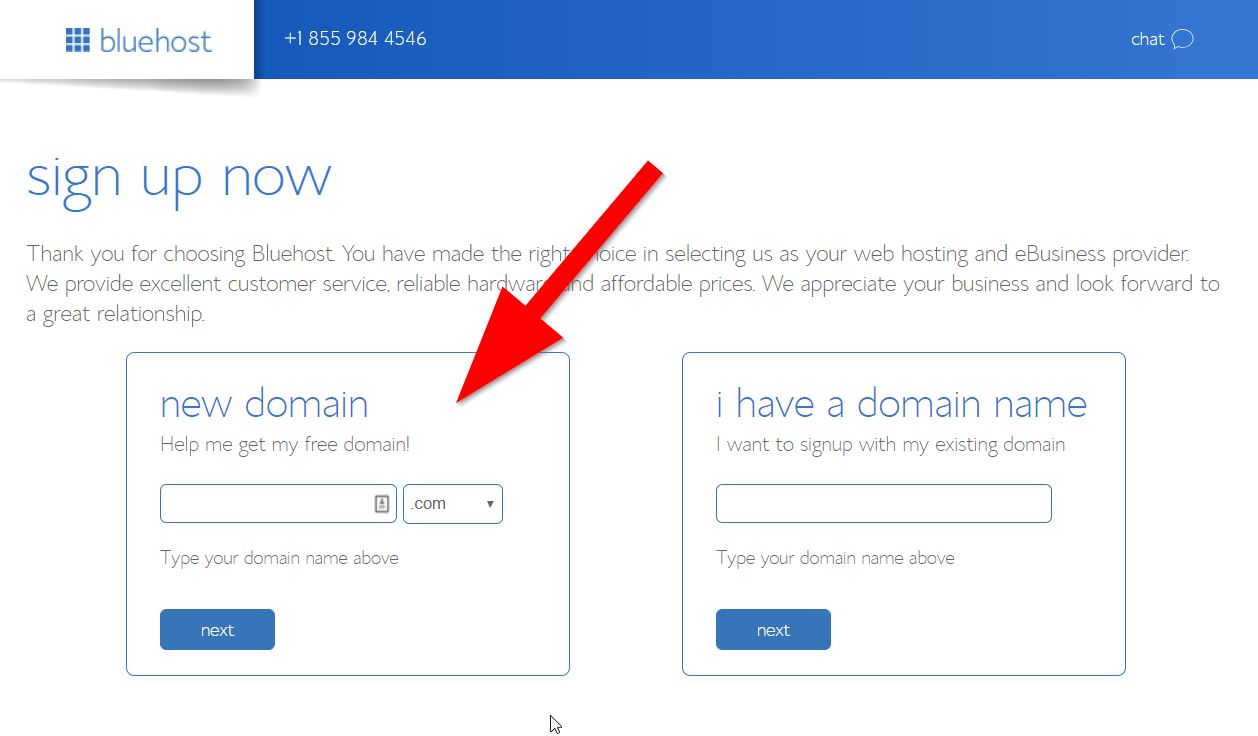
Now, you will have to add your account information, such as name, address, email etc…
Then, you will have to select your plan, you will see that if you chose to prepay in advance for many months, your total cost will go down significantly, but if you are short on funds, you can always choose the first option.
Yes, it might seem a little too much to pay $60-$70 upfront, but you basically prepay for the whole year, instead of paying $5 every month. Plus you also get the chance to save a lot of money if you buy your hosting plan for a longer period.
You can’t really make money online without having a website, and to have a website you need to have web hosting. Pretty much all web hosting companies have the same pricing, so you’re not really paying anything extra just to use Bluehost, you can use any web hosting that you want, but I recommend Bluehost just because of how easy and reliable they are to work with.
You also need to treat this as a business, and $5 or less per month (basically a cup of coffee) for this is really not that much, compared to a real-life business, where only rent can be at least $1000 a month, so as you can see it’s not really that much.
Ok, back to setting up you web hosting… so after you chose your plan you will get the option to buy some extra packages.
Bluehost will try and sell you some extra upgrades for your account that you honestly don’t need, so in order to save money, you can remove them by disabling/unchecking the following services:
SiteLock Security-Find – (You can remove this)
CodeGuard Basic- (You can remove this)
BlueHost Seo Tools Start – (You can remove this)
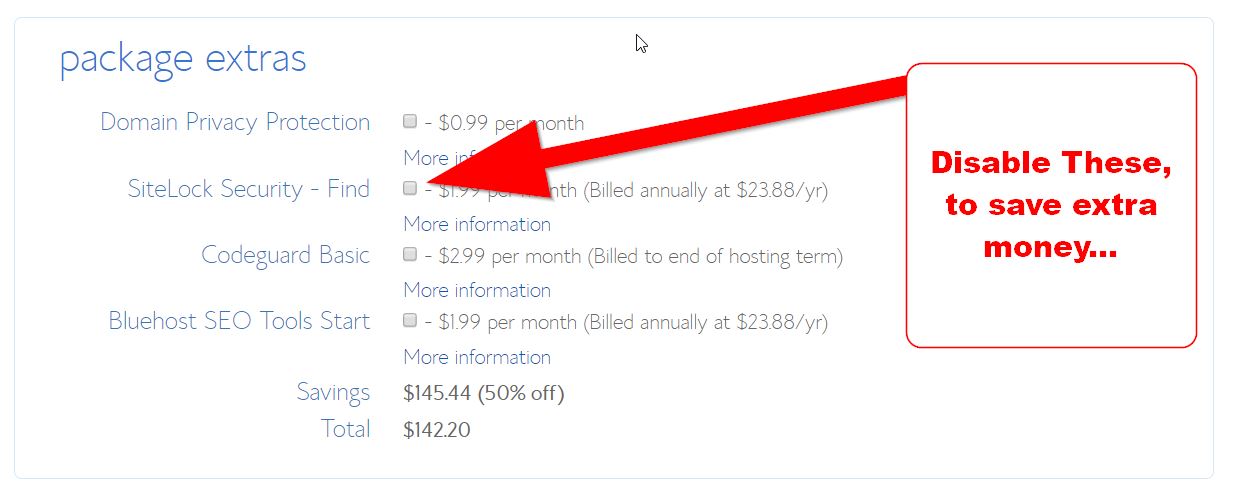
You don’t need all these extra options and tools, because you will get all of these and more by using security and SEO plugins later on in our WordPress installation, and they will be free.
You can also remove “Domain Privacy Protection”, it depends if you are bothered if people can see who registered the domain name and your personal address.
For example, someone might want to see who created your website and who registered the domain name, so if you don’t have the Domain privacy protection, they will easily find out your name, address, etc… so this one is up to you if you care about this or not.
Truth be told, not that many people will go and search who registered your domain name, but anyway…this one is up to you.
I personally have all my domains privacy protected, since I don’t want people finding out my address or email etc… but I do that because I have many popular websites, so now instead of people seeing my actual address and email, and phone number etc, they will see the information of the hosting company, and the phone number of Bluehost, etc…
Next, enter your billing information… you can choose to pay by Credit Card or PayPal, when you are done with that, you click on Submit, and move to the final step, creating the website.
You will receive an email with your username and login info, you will use that to login to your Bluehost dashboard in order to start creating your website.
3. Setting Up WordPress
After you’re logged in, Bluehost will automatically start installing WordPress on your domain and hosting account. However, if it doesn’t do that automatically you will have to manually click on the Install WordPress button next to your domain name.
Click on the Install WordPress button, and go through the installation, you don’t need to pay for someone to do it for you since it’s so easy, you can do it yourself in no time.
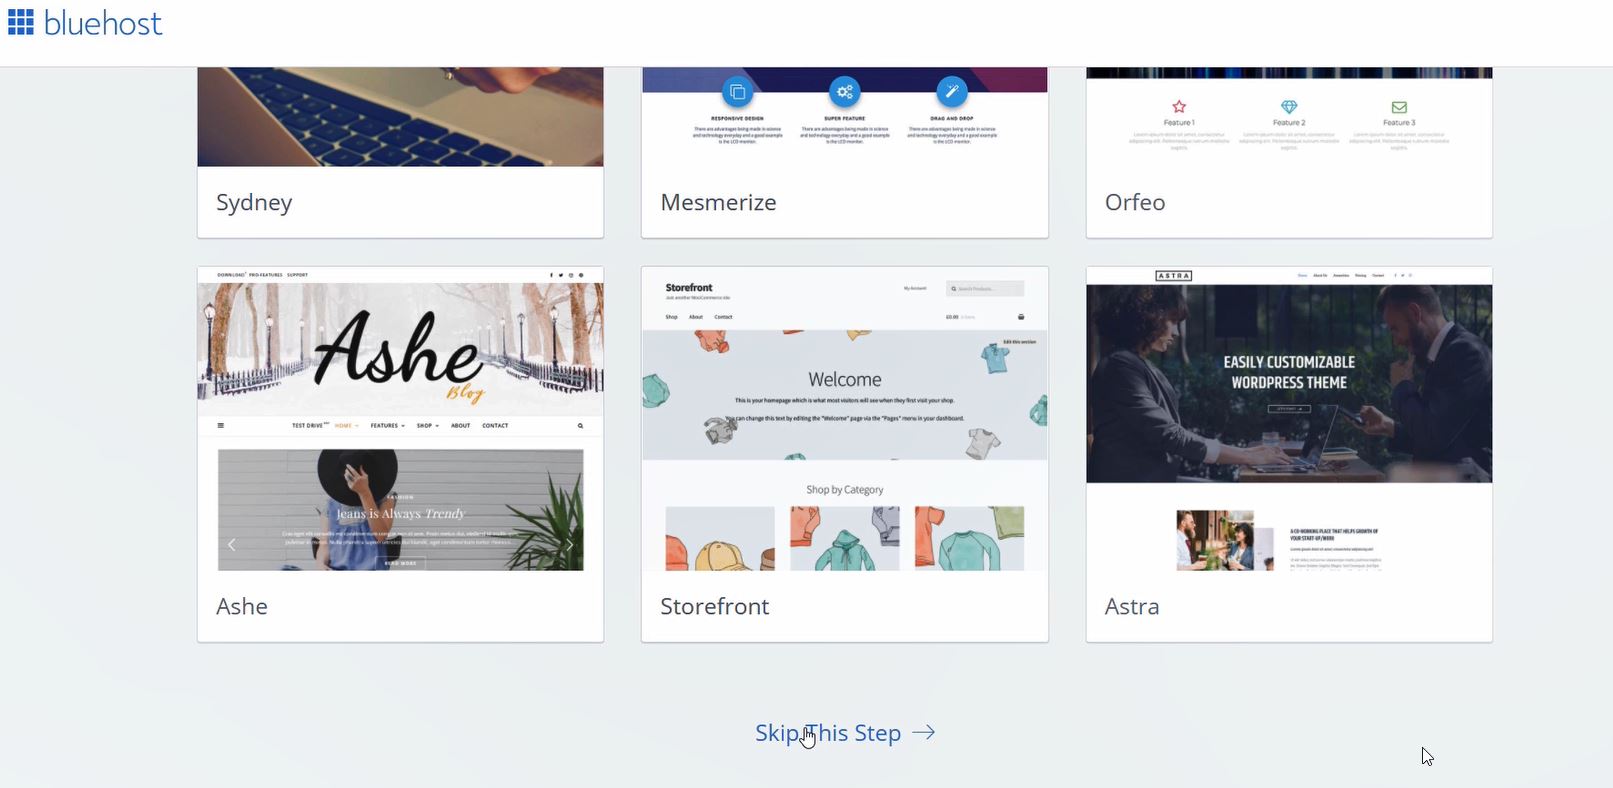
After clicking on the Install Now button, you will get the option to buy some themes for your website, don’t buy any of them, because we will be using free themes that are just as good.
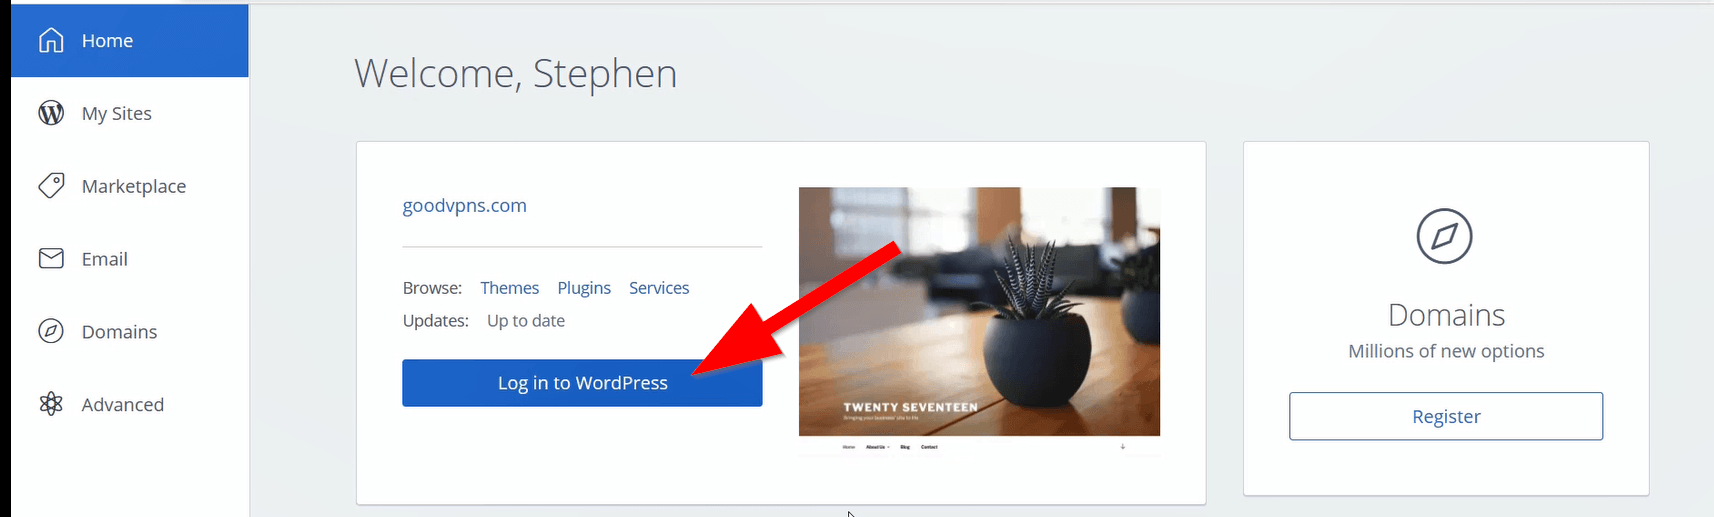
After the installation is done, you will get your username and password that you will use to log-in to your website now, or simply click on the Login To WordPress button and you will be taken right into WordPress dashboard automatically.
4. Customizing WordPress
The website is basically already set up at this point, you have a domain name, a web hosting, and you have wordpress installed. Theoretically you could go straight away and start creating and writing content. But hang on, just a minute, you want to have a nice and catchy website that it’s easy to navigate and looks good on every device (laptop, tablet, smartphone, etc).
So let’s make your website a little better and more beautiful.
First, install a free WordPress theme.
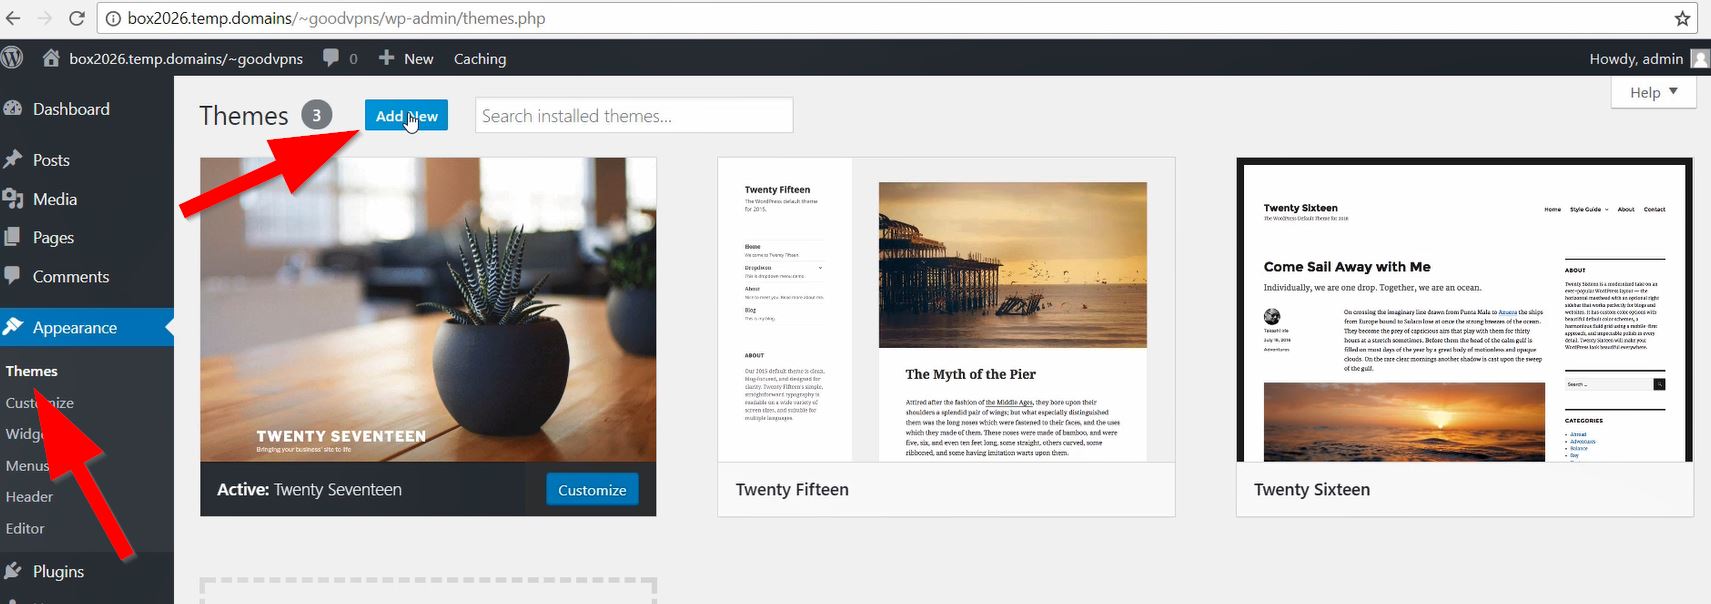
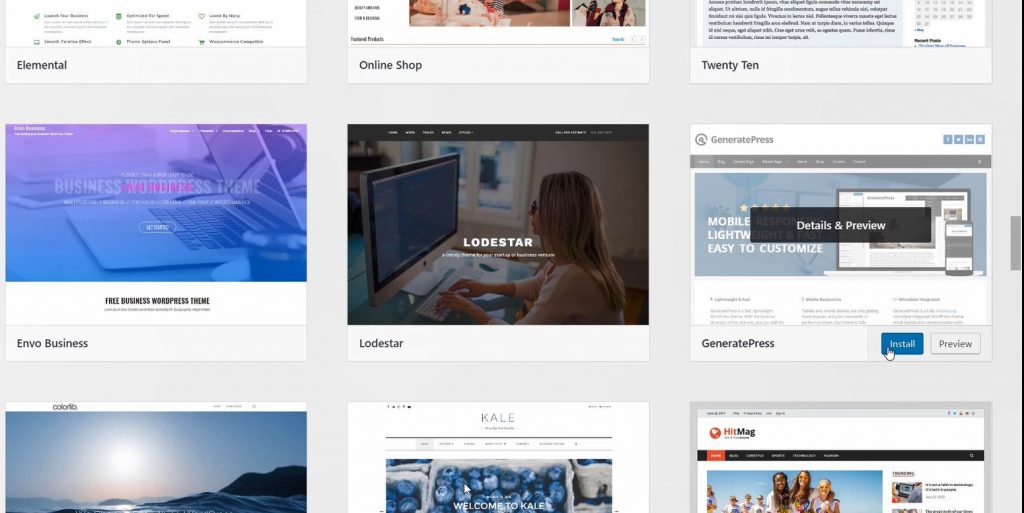
Go to Appearance, click on Themes, after that on Add New then search for the ones you like (see the popular or featured tab to see what’s hot and what other people are using). But I suggest you use GeneratePress a free WordPress theme that is very lightweight, looks good, it’s easy to set up and it’s also responsive on all devices.
So if you want you can go ahead and search and install GeneratePress if not you can use any other theme that you like, totally up to you, and also depends on what kind of website you’re creating… but as you can see there are many free and beautiful themes to chose from.
After that, you can try to use the Customizer if you want to change the colors, and layout and other things for your theme. Go to Appearance > Customize and play with the settings there until you like what you see 🙂
Get some plugins
After that, you will need to install a few plugins, remember earlier when I told you to remove those extra services from Bluehost? You can get all of them for free by using WordPress plugins.
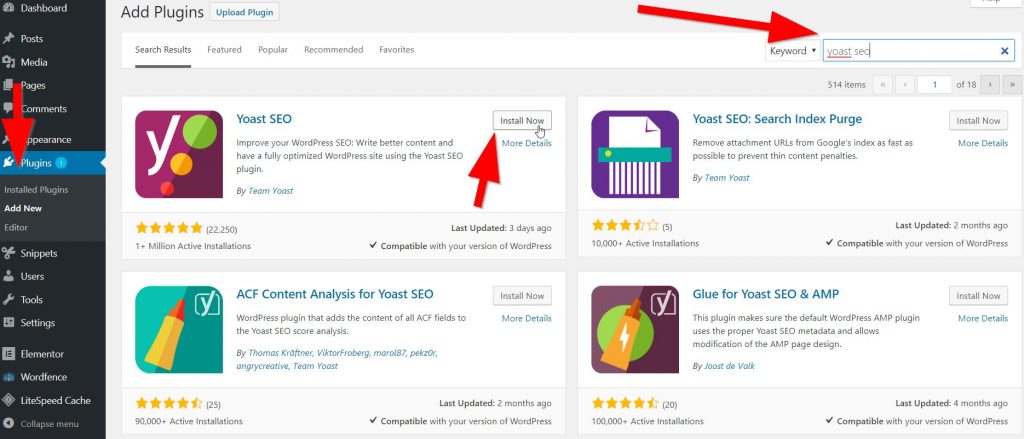
Go to the Plugins tab and click on “Add New”, now search for Yoast SEO plugin and install and activate it, you can use the wizard that Yoast provides to quickly set up the plugin for your website, and if you want to edit more functions you can do so, but first check out a few videos on youtube on how to configure Yoast SEO manually. I will have to do a guide on that later on…
Yoast SEO basically helps you in setting up your website for search engine marketing (SEO) and to make it easier for your articles and site to come up in Google searches. Of course, by simply installing this plugin you won’t automatically get into Google’s top positions, but it helps to guide you on the right direction on how to write for SEO and optimize your content better.
After that, you can install WordFence, if you want for better website security, you can leave it on as default and no need to mess with the settings, just make sure that you turn on the firewall option. You will pretty much be told what to do by the plugin, so again, don’t worry it’s easy, just a few clicks.
To make your website faster, install a caching plugin. This helps you save on bandwidth and also decrease the loading time of your website for your visitors, which is very important for you, your users and also for Google in terms of SEO (search engine marketing)
I recommend you use WP Super Cache, or W3 Total Cache, either of them is good, I would go with WP Super Cache since it’s easier to set up, again just a few clicks and set it to “Cache Website” after you install and activate it.

Now let’s install a plugin for preventing comment spam: Antispam Bee, search for it and install it like you did before.
That’s about it for plugins, these are the bare minimum that you need in order to have your website running smoothly and secure, there are many more plugins that you can install, some of them are free, some of them are paid, but in general don’t have too many plugins installed as that will make your website too heavy and slow to load, and you don’t want to have a slow loading website.
I suggest no more than 12-15 plugins installed.
You can also check out my list of 14 Best WordPress Plugins for Affiliate Marketing, some of these are still good to use even on a normal website.
Set up permalinks
Go to Settings > Permalinks and chose the “Post Name” option. Basically this will make every URL of every article you write to only include the name in the link, instead of the category + date etc…
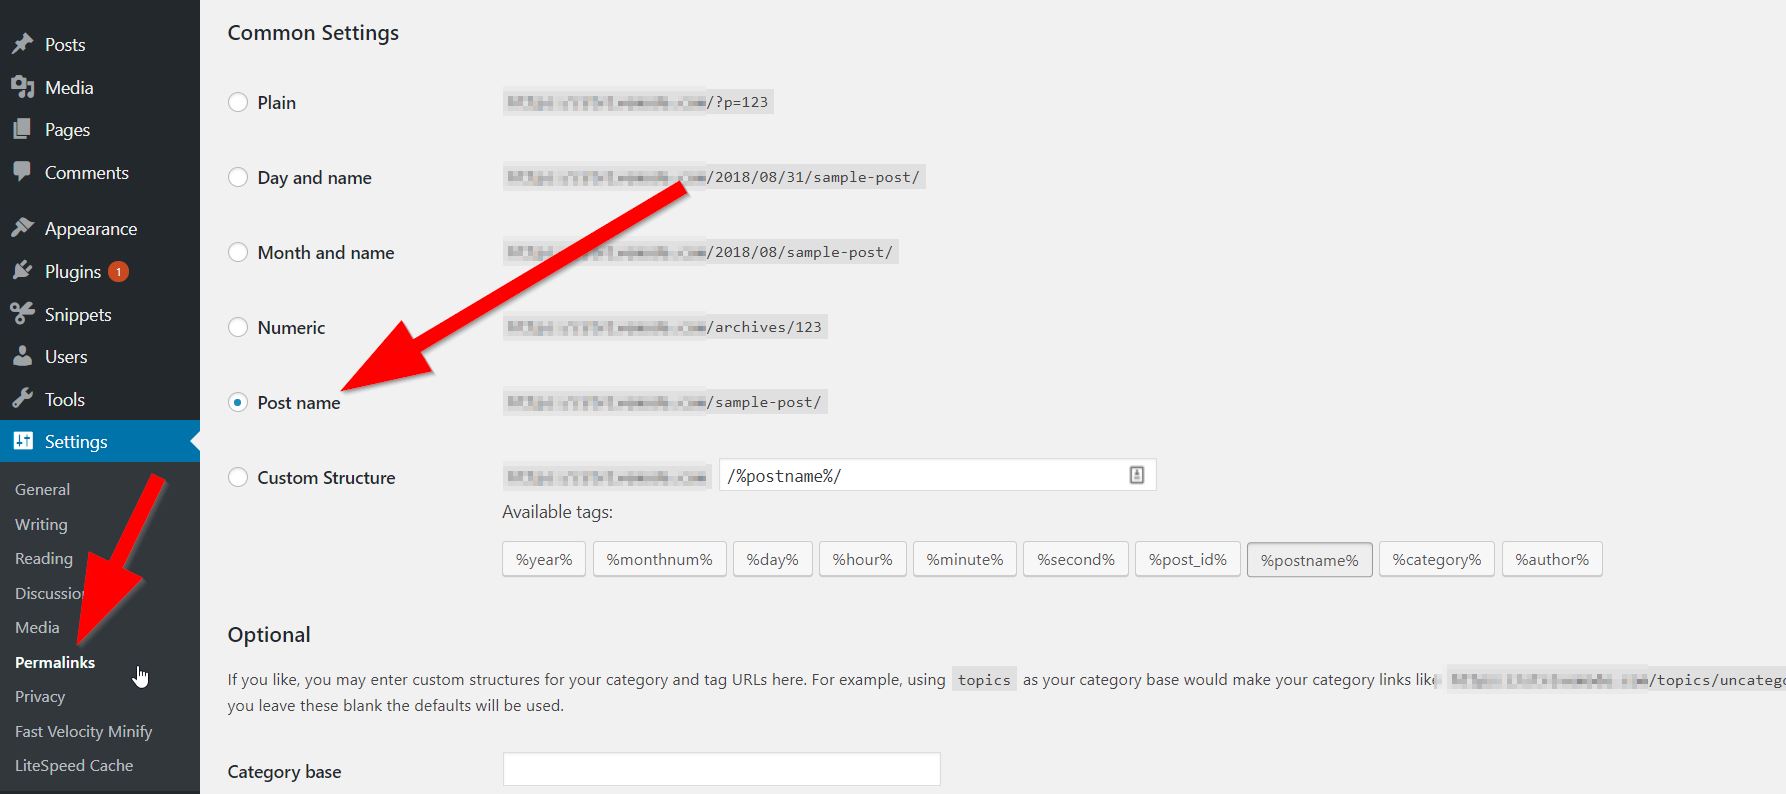
So instead of: https://example.com/2018/08/31/sample-post/ you will now only have: https://example.com/sample-post
This makes it much easier for your users to remember and share your article and also it’s better for SEO, which is very important.
And that’s about it.
Congratulations!

You now have a fully working website In Under 15 Minutes.
All that is left now, is to create content and promote the hell out of it. For more tips on how to write good content check out another guide that I wrote:
Write amazing articles, do SEO, get backlinks, promote it on social media.
Easier said than done, I know… but with time and dedication, you will succeed.
And most important of all make MONEY out of it, by monetizing it with ads and affiliate marketing. Don’t forget to also learn how to get traffic to your blog.
VIDEO Tutorial
I’ve put this together in case you are stuck somewhere, and if you want to see exactly how to make a website in just 15 minutes.


Hey !
I really love your theme it’s really simple and light
Can I know which theme are u using ? And is it on WordPress ?
And which font are you using ?
Generate Press, but it’s heavily customized and modified by me.
Hello Stephen,
I can’t get through the checkout page on Bluehost, I keep on getting this phone No error, I contacted 3 different agents from their support chat but no one could resolve this, I thought maybe you’ll have an idea. Even though I tried all the possible formats to enter my phone number I’m still stuck there.
Hi Hayat,
That is weird, specially since they couldn’t help you sort it out. I’ve just tried it myself now and it works for me. Did you make sure to select the country correctly and add your number without the country code since the code is added automatically?
You could also sign up via Google from what I see, so maybe you can try that one out if you can’t solve the phone problem.
What does the error say?
In any case if you are still not able to sign up even after you talk with the support team then I recommend you to also try SiteGround another great hosting company… and maybe the checkout process will be easier there. The whole WordPress installation, however, will be of course different since this guide was made with BlueHost in mind.
Best of luck,
Stephen
Hi,
Thank you for checking it out for me, it’s really frustrating since I want to follow up with your guide. I still get the same two errors:
Under the Phone box : NOTE: Auto-adjusting phone [555010xxxx] => [+90.555010xxxx] (No action is required.)
On top of the page : Credit Card problem: result.code.harddecline. Be careful, you have 1 try left.
I did make sure to type my phone No without the country code, and there is nothing wrong with my card, I use it online all the time. Now my only guess is that because i have this 3D secure protection on my card and since they don’t accept my number the payment won’t go through. i tried my friend’s Phone No, same issue T_T
Hi Hayat,
Sorry for the late reply.
Anyway, I have no idea really why it isn’t working, I guess if the support guys couldn’t figure out and fix it for you, then I’m afraid I won’t have any better options for you.
What I recommend is to check out Siteground if you’re still having problems with BlueHost, but yeah the process of the WordPress setup will be entirely different and I guess I should create another tutorial in the future for using WordPress with Siteground.
You could try and find some tutorials on youtube for installing WordPress with Siteground though.
Best of luck,
Stephen
Hello Stephen,
Thank you for your answer.
Is it possible to make money through other ways other than Adsense?, because my aim is to create a website that would generate me money through different ways not only relying on Adsense 100 per cent.
Thanks in advance.
Hi Ahmad,
Yeah of course, you could also try affiliate marketing promoting ebooks, products, offers etc.
Hello Stephen,
A very helpful article, as usual, thanks once again.
You talked in your article about high-quality website if one is to apply for Google Adsense. Do you recommend to do it myself following these steps you mentioned and some youtube videos or I hire someone to do it for me? a website for google Adsense I’m talking about.
Thanks in advance
Hi Ahmad,
You can do it yourself, it’s not really that hard… especially if you use one of the themes I’ve talked about in my adsense posts. The only thing that’s very important on an AdSense website is the content. So if you can’t create original and unique content yourself, then that is the part you will have to outsource and find someone else to write it for you.
Also make sure you have About, Contact, Policy, Terms, pages.
Good luck,
Stephen
hi i really inspire with your article, i love this tricks, and i will follow this. nice job dude.
Keep good work.
Could you help me to setup w3total cache… and helpful post keep it up for new blogger.